🔌 How to Wire a Simple Light Circuit at Home – Step-by-Step Guide for Beginners
Meta Description:
Learn how to wire a basic light circuit at home with this beginner-friendly, step-by-step guide. Includes tools, safety tips, wiring diagrams, and troubleshooting advice.
Target Keywords:
- how to wire a light circuit
- DIY home lighting
- beginner electrical wiring
- light switch wiring tutorial
- home electrical project
💡 Introduction: Why This Guide Exists
Ever flipped a switch and wondered what’s going on behind the wall? I used to think wiring was something only electricians could do—until I tried it myself. Turns out, wiring a basic light circuit is totally doable with the right tools, a little patience, and a strong respect for safety.
This guide is for anyone who wants to install a light fixture, replace a switch, or just understand how home lighting works. Let’s break it down, step by step.
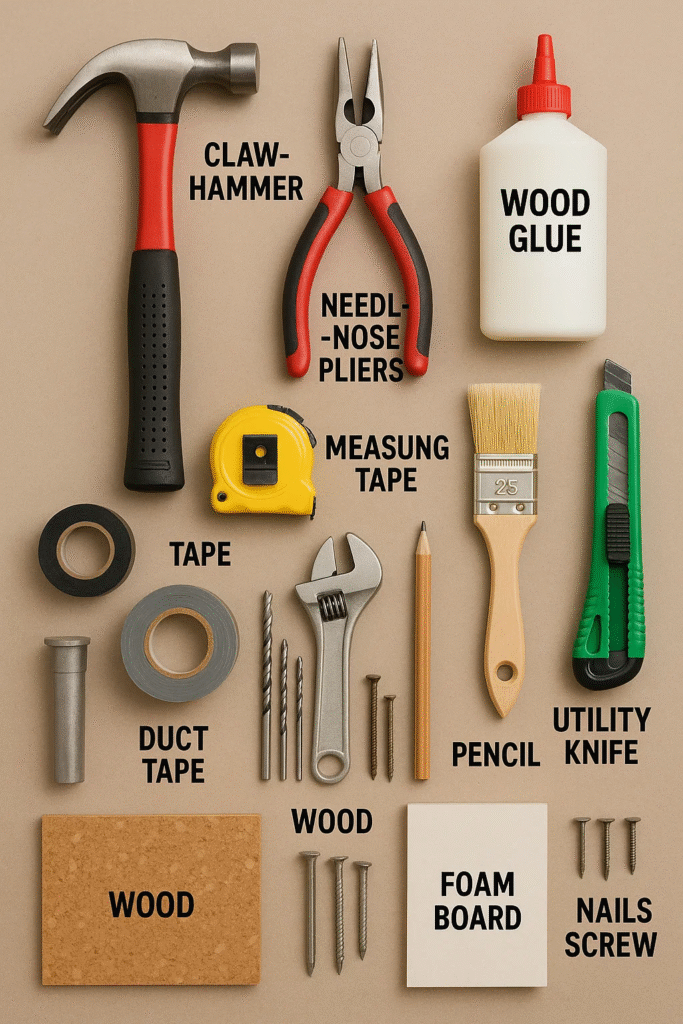
🧰 What You’ll Need
Tools & Materials:
- Light fixture (bulb holder or ceiling light)
- Single-pole light switch
- Electrical wire (14/2 or 12/2 NM cable)
- Wire strippers
- Screwdrivers (flathead and Phillips)
- Voltage tester or multimeter
- Electrical tape
- Wire nuts
- Electrical boxes (for switch and fixture)
- Access to your circuit breaker panel
Optional but helpful:
- Stud finder
- Drill
- Fish tape
- Cable staples or clamps
⚠️ Safety First—Seriously
Electricity is no joke. Always follow these safety basics:
- Turn off power at the breaker.
- Use a voltage tester to confirm wires are dead.
- Wear rubber-soled shoes.
- Avoid working in wet areas.
- Follow local electrical codes.
- If unsure, stop and call a pro.
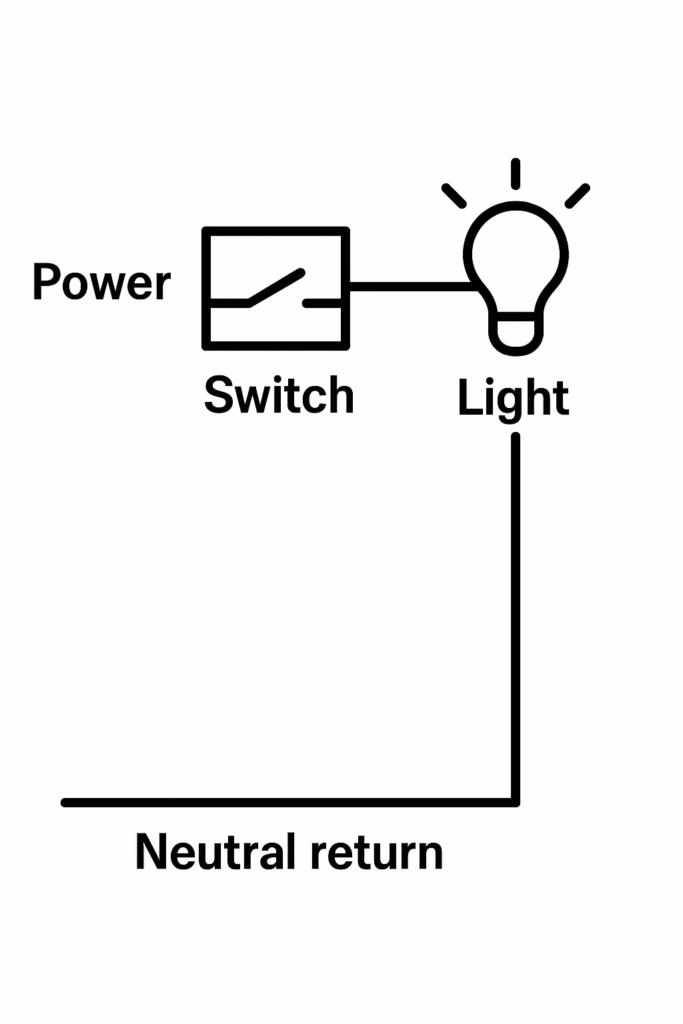
🧠 How a Simple Light Circuit Works
Here’s the basic flow:
- Power comes from the breaker panel.
- It flows to the switch, which controls the light.
- From the switch, it goes to the light fixture.
- Then it returns via the neutral wire to complete the circuit.
🗺️ Step 1: Plan Your Layout
Sketch your setup:
- Where’s the power source?
- Where will the switch go?
- Where will the light be mounted?
- How will the wires run?
Pro Tip: Keep wire runs short and direct.
🧱 Step 2: Install Electrical Boxes
Mount boxes for the switch and light fixture:
- Switch box: ~48–52 inches from the floor
- Fixture box: Centered on ceiling or wall
Use a stud finder to avoid pipes or framing.
🔌 Step 3: Run the Cable
You’ll need two cable runs:
- Power source → switch
- Switch → light fixture
Use 14/2 NM cable for 15-amp circuits or 12/2 for 20-amp. Secure with staples or clamps, leaving 6 inches of wire inside each box.
✂️ Step 4: Strip the Wires
Strip about ¾ inch of insulation from:
- Black (hot)
- White (neutral)
- Bare copper (ground)
Be gentle—don’t nick the copper.
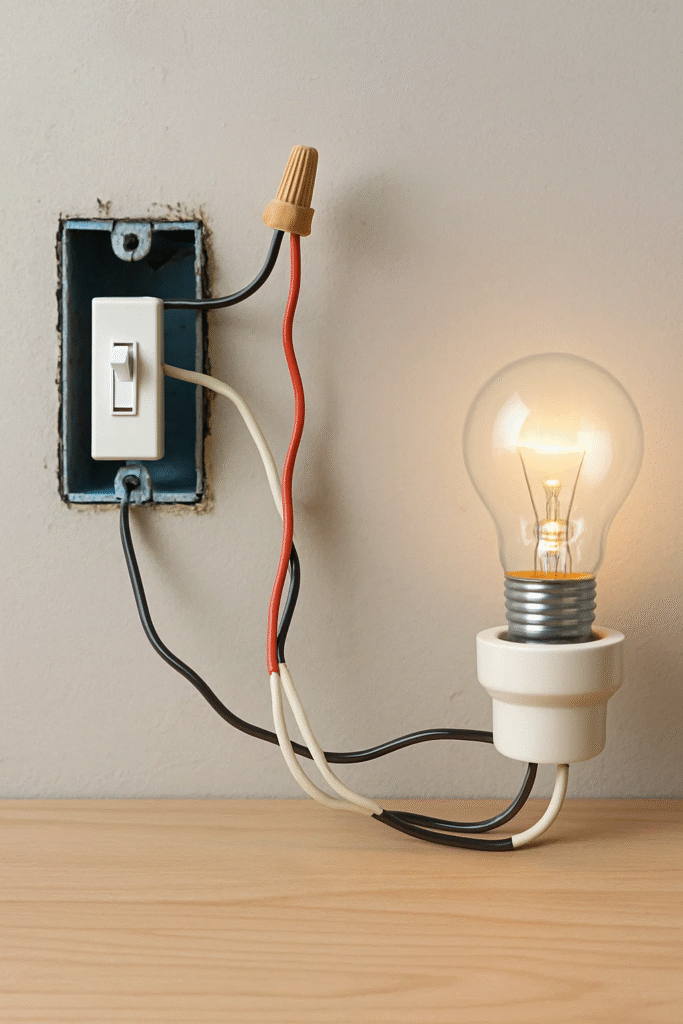
💡 Step 5: Wire the Light Fixture
At the fixture box:
- Connect white to white (neutral)
- Connect black to black (hot)
- Connect ground wires together and to the fixture’s ground screw
Use wire nuts and wrap with electrical tape.
🔁 Step 6: Wire the Switch
At the switch box:
- Connect black from power to one switch terminal
- Connect black to light to the other terminal
- Twist white wires together and cap
- Connect ground wires and attach to switch’s ground screw
Tuck wires neatly and mount the switch.
⚡ Step 7: Connect to the Power Source
At the breaker panel:
- Black (hot) → breaker
- White (neutral) → neutral bus bar
- Ground → ground bus bar
Important: If you’re not confident here, call a licensed electrician.
✅ Step 8: Test the Circuit
- Turn the breaker back on
- Use a voltage tester to check power
- Flip the switch—your light should turn on!
If not, double-check connections and breaker status.
🧾 Troubleshooting Tips
| Problem | Possible Cause | Fix |
|---|---|---|
| Light doesn’t turn on | Loose wire, bad bulb, breaker off | Check all connections and bulb |
| Breaker trips | Short circuit | Inspect wiring for contact or damage |
| Switch feels hot | Overloaded or faulty switch | Turn off power and replace switch |
🧠 Real-Life Moment: My First DIY Light
The first time I wired a light, I was nervous. I triple-checked every connection, flipped the breaker, and… nothing. Turns out, I hadn’t twisted the wire nut tight enough. A quick fix later, the light flicked on—and I felt like a genius.
📘 Quick Glossary
| Term | Meaning |
|---|---|
| Hot wire | Carries current from power source (black) |
| Neutral wire | Returns current to source (white) |
| Ground wire | Safety path for electricity (bare/green) |
| NM cable | Non-metallic sheathed cable (e.g., 14/2) |
| Junction box | Enclosure for electrical connections |
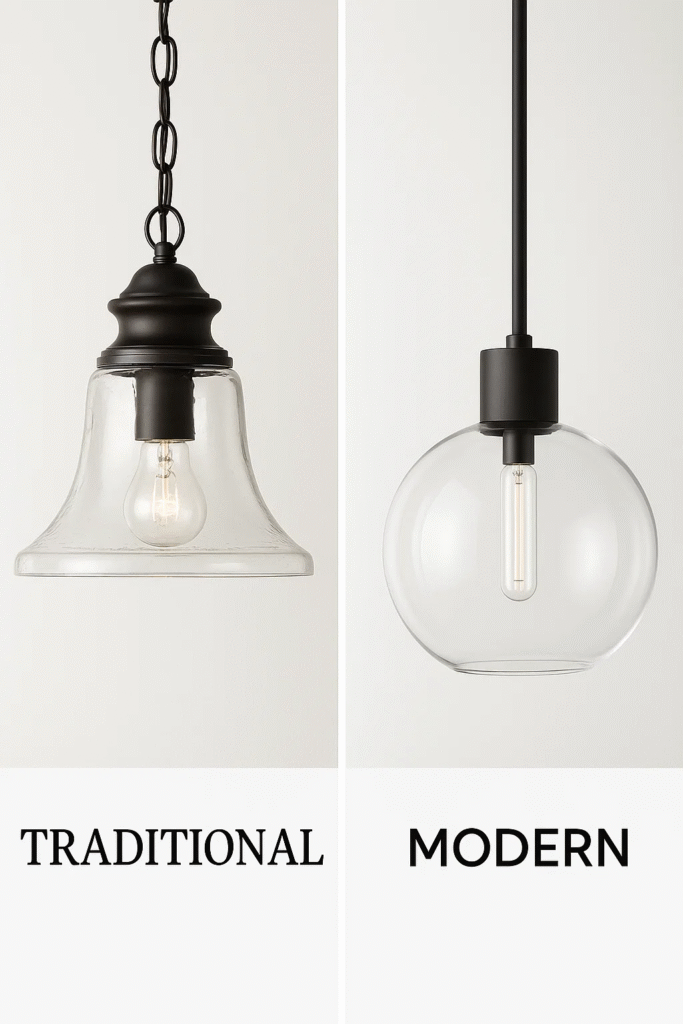
🛍️ Choosing the Right Light Fixture
When picking a fixture:
- Match wattage to your circuit
- Choose LED for energy savings
- Pick a style that fits your space—flush mount, pendant, sconce, etc.
🎯 Final Thoughts
Wiring a simple light circuit is one of those DIY projects that feels intimidating—until you do it. Then it’s empowering. You learn how your home works, save money, and gain the confidence to tackle more.
🔚 Conclusion:
Wiring a simple light circuit might have felt overwhelming before, but now you’ve got the knowledge and structure to handle it like a pro. From understanding how the circuit works to planning your layout, wiring the switch and fixture, and flipping that switch for the first time—this project is as much about building confidence as it is about installing a light.
Will you make small mistakes? Maybe. But that’s part of the learning process. The real reward comes the moment that bulb lights up and you realize you made it happen.
Keep safety at the core, take your time, and don’t hesitate to ask questions or bring in help when you need it. With each project, your skills will grow—and soon enough, this “beginner” job will feel like old news.